0.项目前言
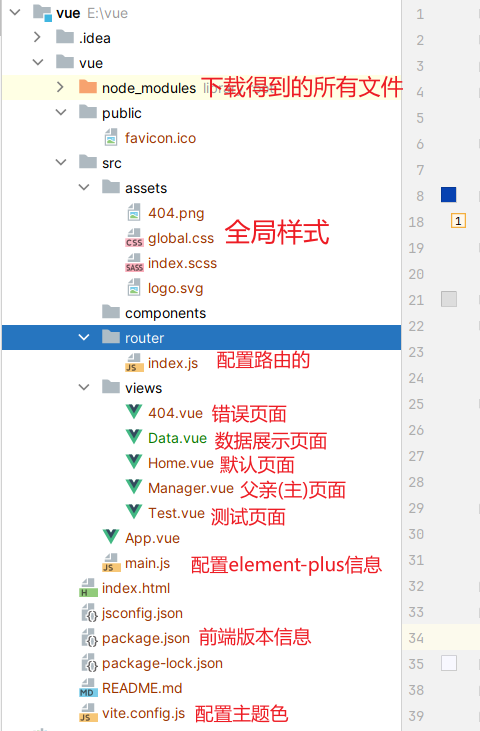
1.项目前端布局
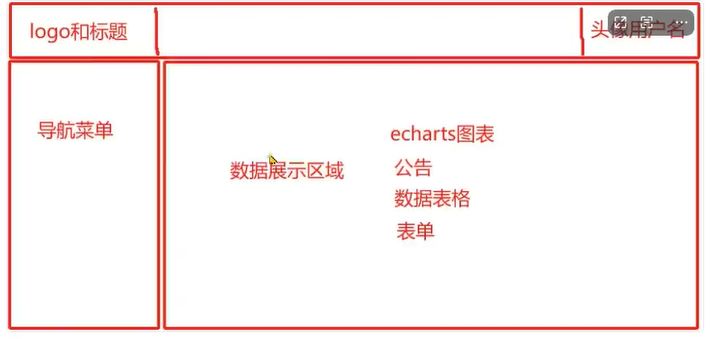
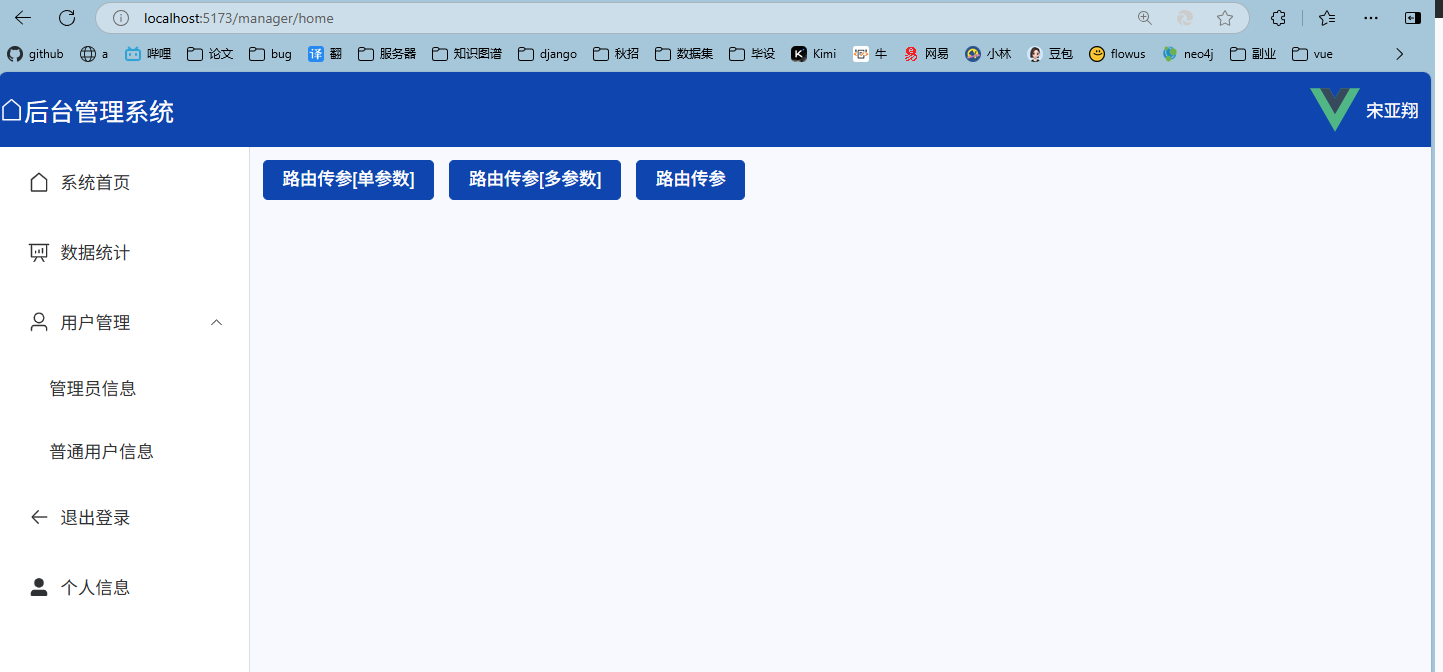
1.1 项目最终页面
1
2
3
4
5
6
7
8
9
10
11
12
13
14
15
16
17
18
19
20
21
22
23
24
25
26
27
28
29
30
31
32
33
34
35
36
37
38
39
| <script setup>
import router from '../router/index.js'
import img from '../assets/logo.svg'
</script>
<template>
<!--1.头部开始-->
<div style="height: 60px; background-color: #0742b1;display: flex; align-content: center">
<div style="width: 200px; display: flex; align-items: center; font-size: 20px; color: white">
<el-icon><House/></el-icon>后台管理系统
</div>
<div style="flex: 1"></div>
<div style="width: fit-content; display: flex; align-items: center;padding-right: 10px">
<el-image :src="img" style="width: 40px; height: 40px"></el-image>
<span style="color: white; margin-left: 5px">宋亚翔</span>
</div>
</div>
<!--2.下面部分-->
<div style="display:flex">
<!--2.1左侧菜单导航-->
<div style="width:200px; border-right:1px solid #ddd; min-height:calc(100vh - 60px)">
<el-menu router :default-activce="router.currentRoute.value.path" style="border: 0" :default-openeds="['1']">
<el-menu-item index="/manager/home"><el-icon><House/></el-icon>系统首页</el-menu-item>
<el-menu-item index="/manager/data"><el-icon><DataAnalysis/></el-icon>数据统计</el-menu-item>
<el-sub-menu index="1">
<template #title><el-icon><User/></el-icon><span>用户管理</span></template>
<el-menu-item>管理员信息</el-menu-item>
<el-menu-item>普通用户信息</el-menu-item>
</el-sub-menu>
<el-menu-item index="2"><el-icon><Back/></el-icon>退出登录</el-menu-item>
<el-menu-item index="3"><el-icon><UserFilled/></el-icon>个人信息</el-menu-item>
</el-menu>
</div>
<!--2.2右侧主体区域-->
<div style="flex: 1; width:0; background-color: #f8f8ff; padding:10px">
<RouterView></RouterView>
</div>
</div>
</template>
|
2.前后端调用步骤
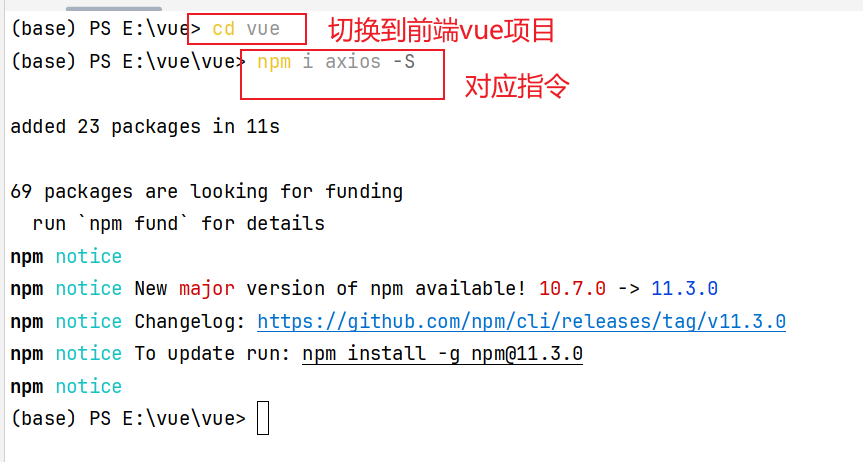
2.1 安装axios封装前后端对接数据工具
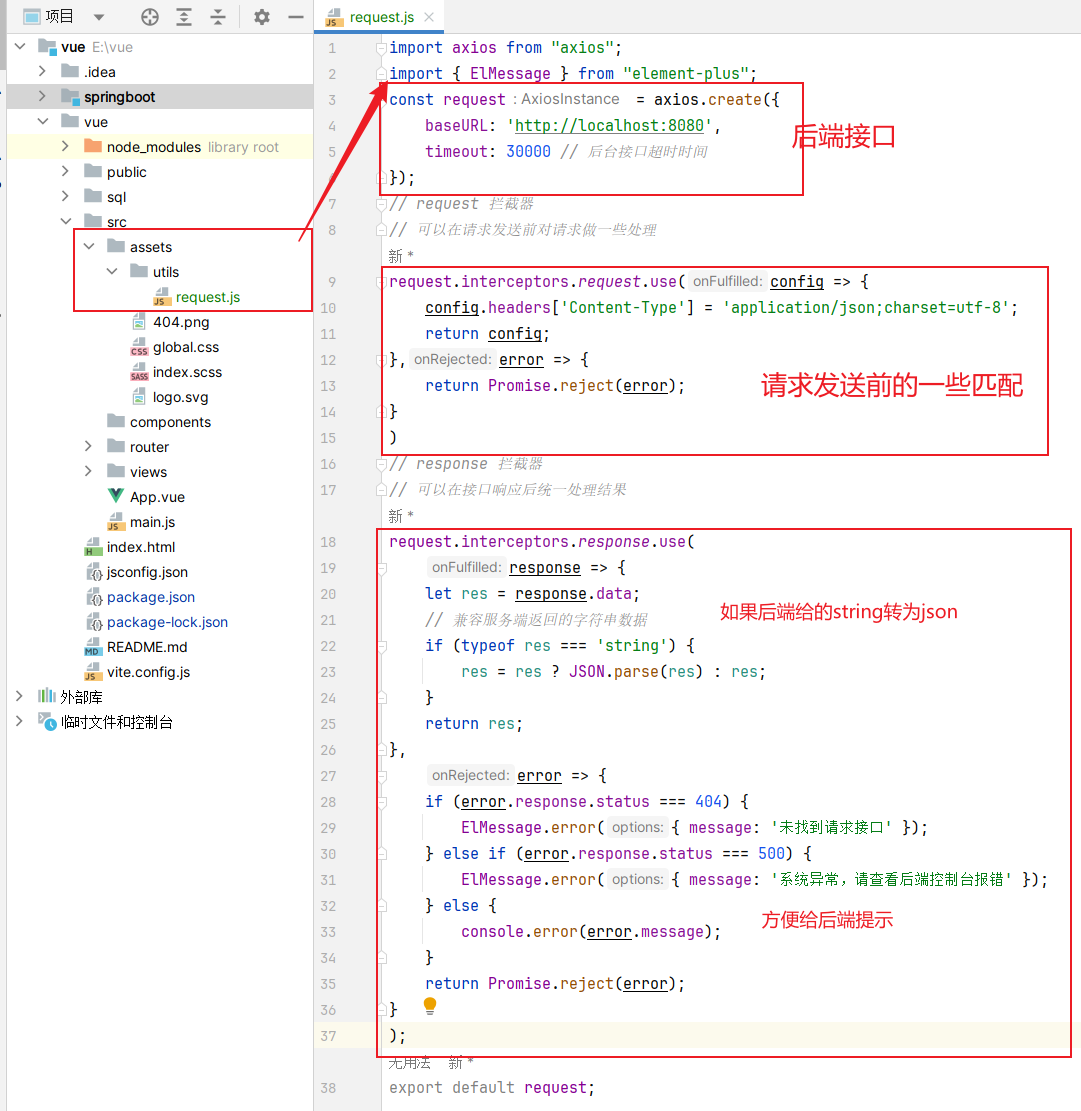
2.2 书写前后端调用逻辑[request.js]
代码位置和内容:
1
2
3
4
5
6
7
8
9
10
11
12
13
14
15
16
17
18
19
20
21
22
23
24
25
26
27
28
29
30
31
32
33
34
35
36
37
38
| import axios from "axios";
import { ElMessage } from "element-plus";
const request = axios.create({
baseURL: 'http://localhost:8080',
timeout: 30000 // 后台接口超时时间
});
// request 拦截器
// 可以在请求发送前对请求做一些处理
request.interceptors.request.use(config => {
config.headers['Content-Type'] = 'application/json;charset=utf-8';
return config;
},error => {
return Promise.reject(error);
}
)
// response 拦截器
// 可以在接口响应后统一处理结果
request.interceptors.response.use(
response => {
let res = response.data;
// 兼容服务端返回的字符串数据
if (typeof res === 'string') {
res = res ? JSON.parse(res) : res;
}
return res;
},
error => {
if (error.response.status === 404) {
ElMessage.error({ message: '未找到请求接口' });
} else if (error.response.status === 500) {
ElMessage.error({ message: '系统异常,请查看后端控制台报错' });
} else {
console.error(error.message);
}
return Promise.reject(error);
}
);
export default request;
|
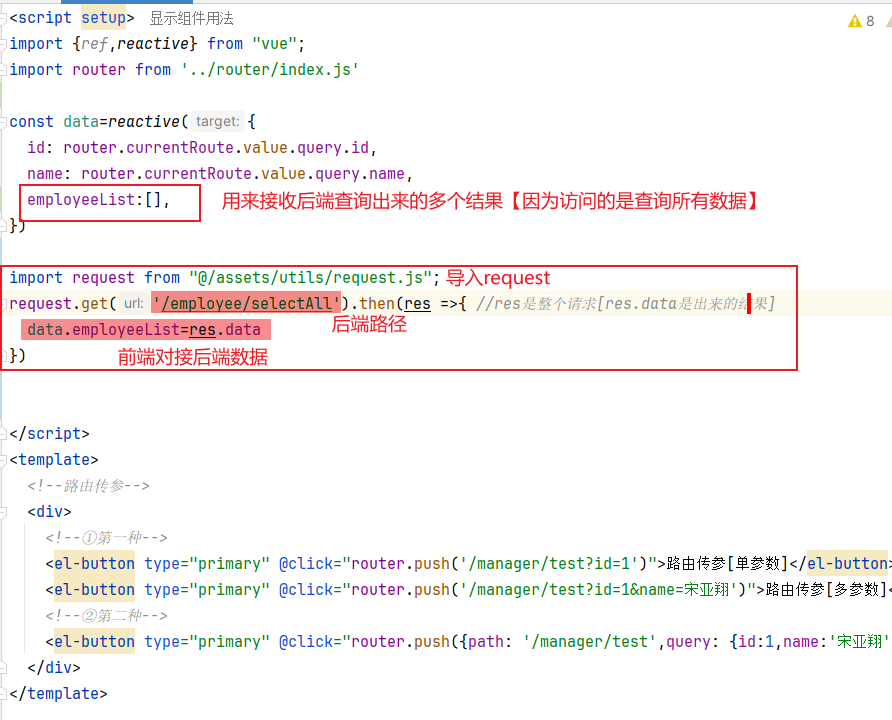
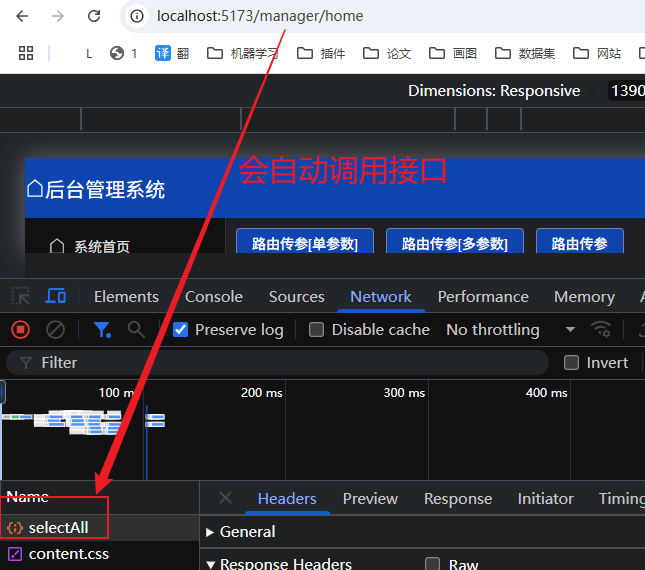
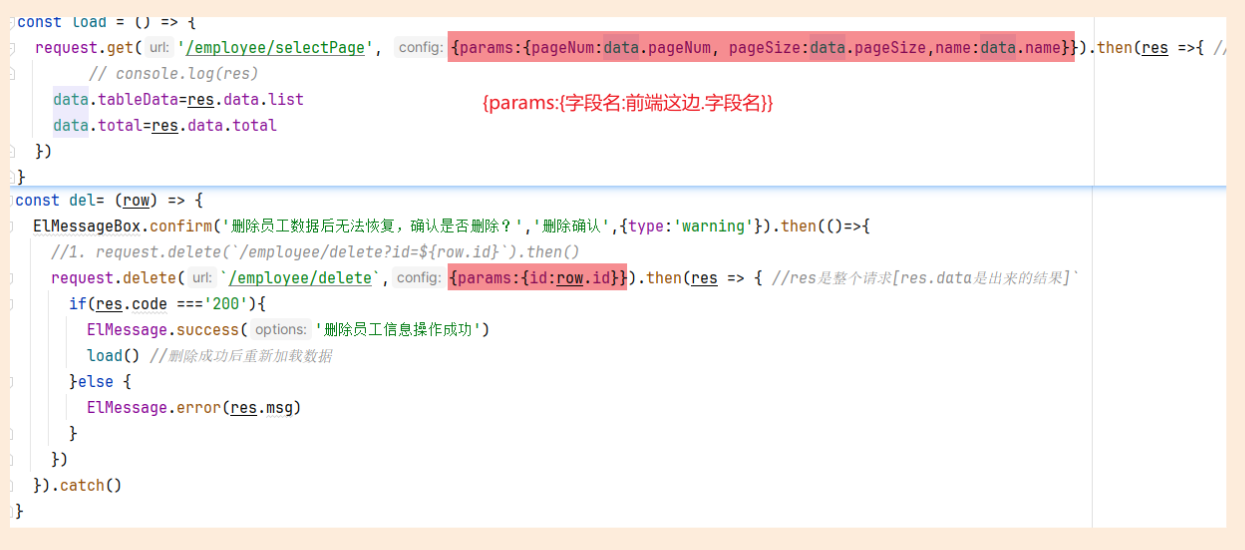
2.3 前端调用后端接口[Home.vue页面]
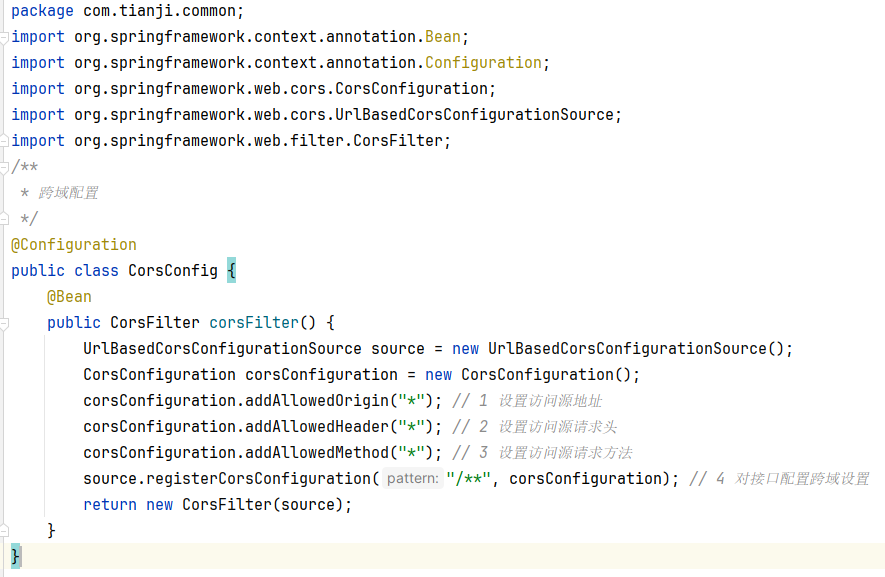
2.4 前后端跨域问题

- 解决方案:【在后端的springboot项目中添加跨域配置】
1
2
3
4
5
6
7
8
9
10
11
12
13
14
15
16
17
18
19
20
21
22
| package com.tianji.common;
import org.springframework.context.annotation.Bean;
import org.springframework.context.annotation.Configuration;
import org.springframework.web.cors.CorsConfiguration;
import org.springframework.web.cors.UrlBasedCorsConfigurationSource;
import org.springframework.web.filter.CorsFilter;
/**
* 跨域配置
*/
@Configuration
public class CorsConfig {
@Bean
public CorsFilter corsFilter() {
UrlBasedCorsConfigurationSource source = new UrlBasedCorsConfigurationSource();
CorsConfiguration corsConfiguration = new CorsConfiguration();
corsConfiguration.addAllowedOrigin("*"); // 1 设置访问源地址
corsConfiguration.addAllowedHeader("*"); // 2 设置访问源请求头
corsConfiguration.addAllowedMethod("*"); // 3 设置访问源请求方法
source.registerCorsConfiguration("/**", corsConfiguration); // 4 对接口配置跨域设置
return new CorsFilter(source);
}
}
|
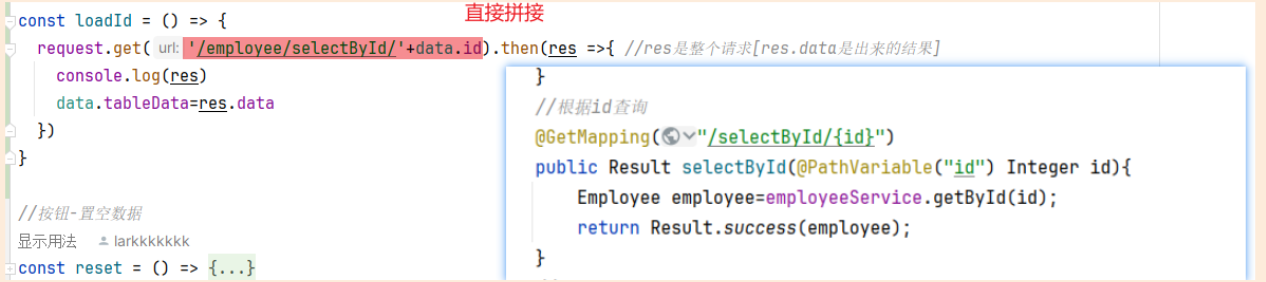
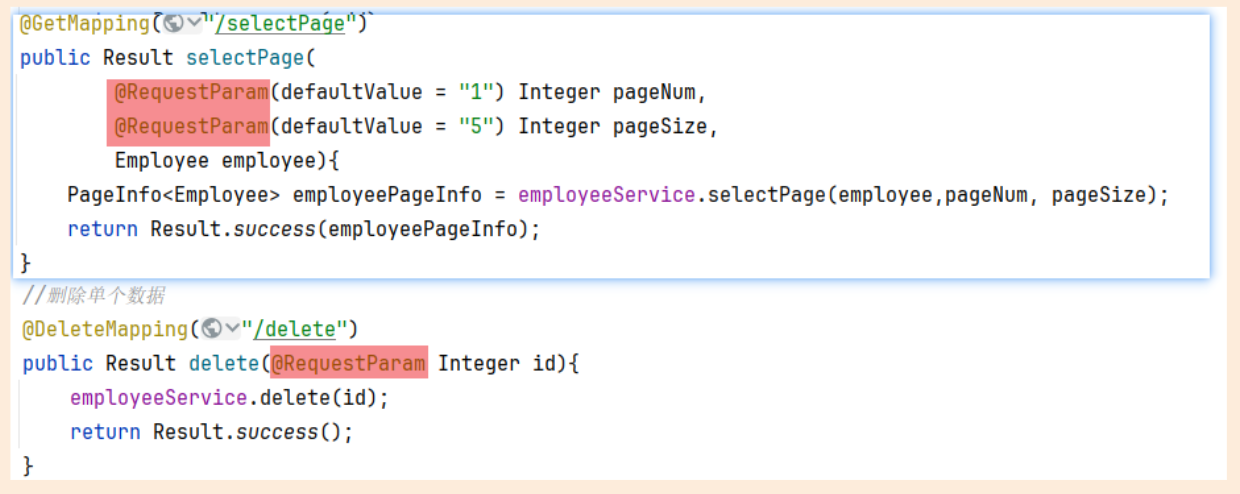
3.前后端接口对应方式
3.1 @RequestParam
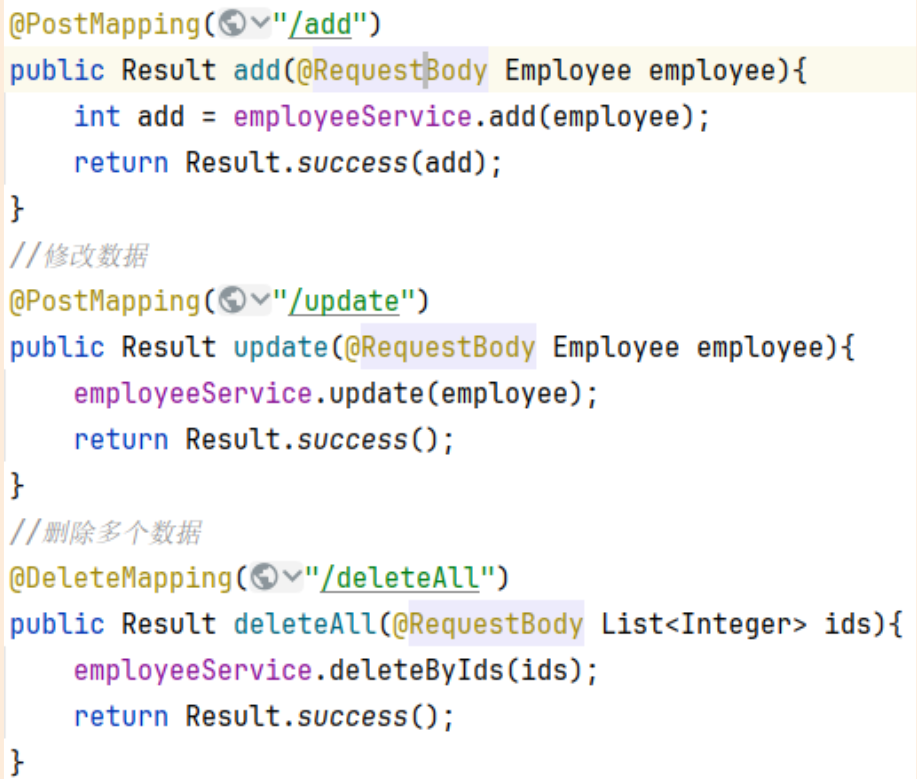
3.2 @RequestBody
3.3 @PathVariable